Google Play is one of the foremost app stores for driving traffic to your application, with over 2.5 billion active users monthly across more than 190 markets worldwide. In this article, we shall guide you through the process of publishing your app on the Play Store and outline how to promote it using ASO (App Store Optimisation).
How to Publish Your App on Google Play
- Register your Google Play Developer account and pay the one-off £25 fee.
- Set up a Google Merchant account for in-app purchases or subscriptions.
- Create your app in the Play Console: select a name, language, type, and pricing, then confirm declarations.
- Complete the required details, including privacy policy, advertising, audience, content rating, and data safety.
- Choose a category and tags to improve discoverability.
- Identify key keywords for your app’s metadata.
- Prepare metadata: app name, descriptions, icon, graphics, screenshots, and videos.
- Test your app with a small audience prior to publishing.
Next, we shall walk through each step in detail and explain the key considerations.
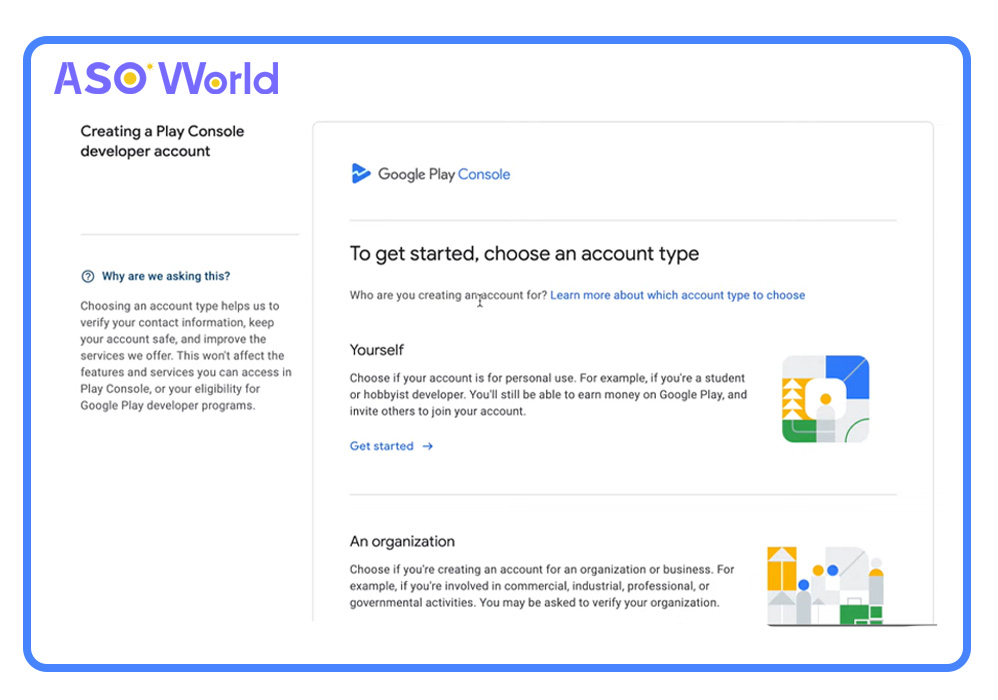
Step 1: Create Your Account in the Google Play Console
To begin, log in to the Google Play Console and create your account. You will need to choose your account type: Personal or Organisational.
Key Requirements for Individual Developer Accounts
From December 2024, Google requires developers creating individual accounts after 13 November 2023 to conduct closed testing with at least 12 testers within 14 days. Failure to comply will prevent your Android app from being published on Google Play. This is a reduction from the previous requirement of 20 testers, a change welcomed by many independent developers.
Until these prerequisites are met, certain Play Console features—such as production releases and pre-registration—will remain unavailable. For detailed guidance, refer to Google Play’s application testing requirements.
If you need to switch accounts later, do not worry—you can easily transfer your apps to a new account.
Provide Basic Information During Account Creation
When setting up your developer account, you will be asked to provide some personal information.
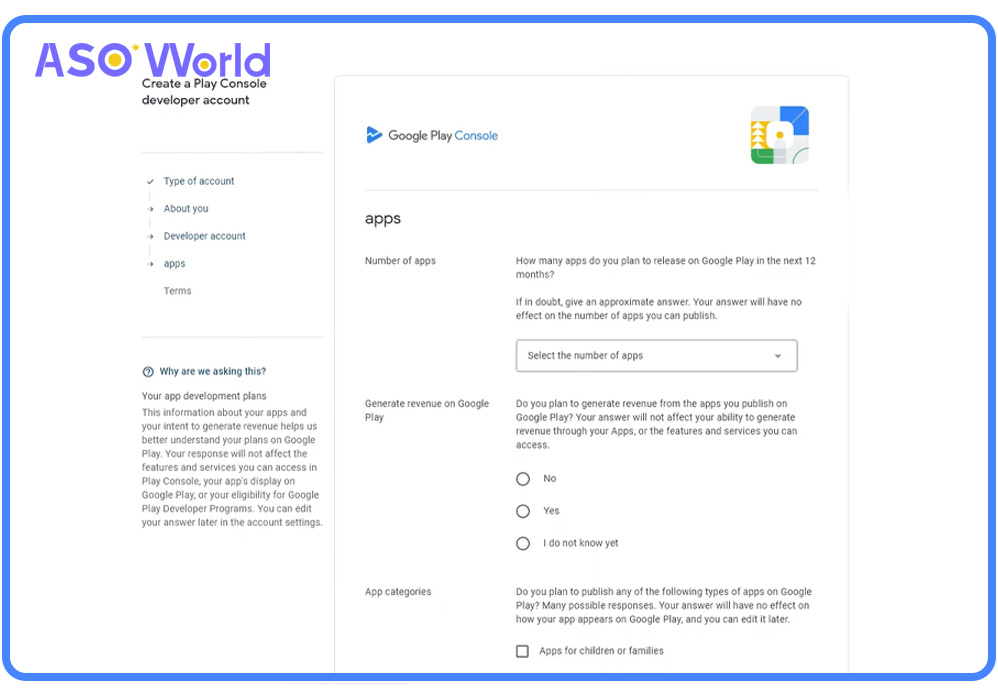
In the “Apps” section, Google will request further information, such as:
- The number of apps you plan to publish.
- Whether you intend to monetise your apps.
- The specific categories of apps you aim to develop.
Pay the Registration Fee
To complete the process, you must pay a one-off registration fee of £25. Once paid, the platform can be used free of additional charges to publish apps on the Play Store.
Account Approval Timeline
Once submitted, Google may take up to 48 hours to approve your account. Rest assured—you can add or modify account details later if necessary.
Step 2: Create a Google Merchant Account
If you plan to sell in-app purchases via your app, you will need to set up a Google Merchant Account.
How to Set Up Your Merchant Account
- Log in to your Google Play Console account.
- Navigate to Settings → Payment Settings.
- Click Create Payment Profile and complete your profile information.
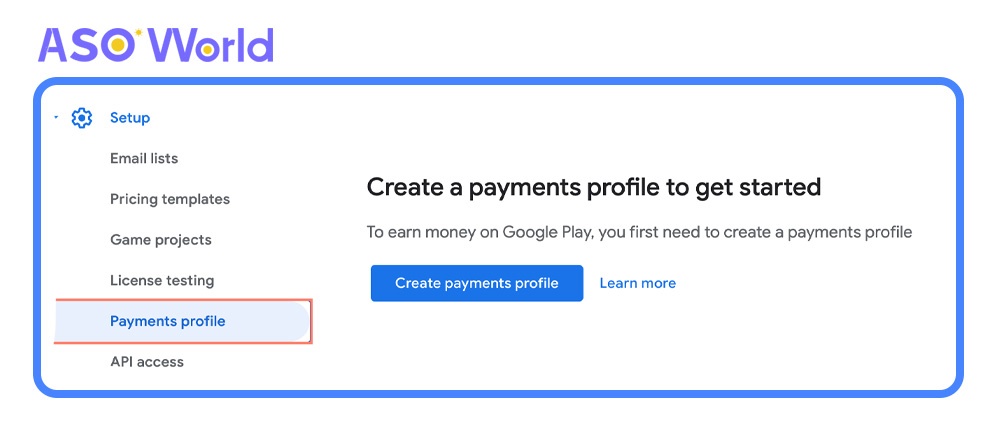
Once set up, you can manage monthly payments and review sales reports. Your Merchant Account will automatically link to your developer account in the Play Console.
Step 3: Create Your App
After creating your account, Google will redirect you to the Play Console to begin creating your app. Follow these steps:
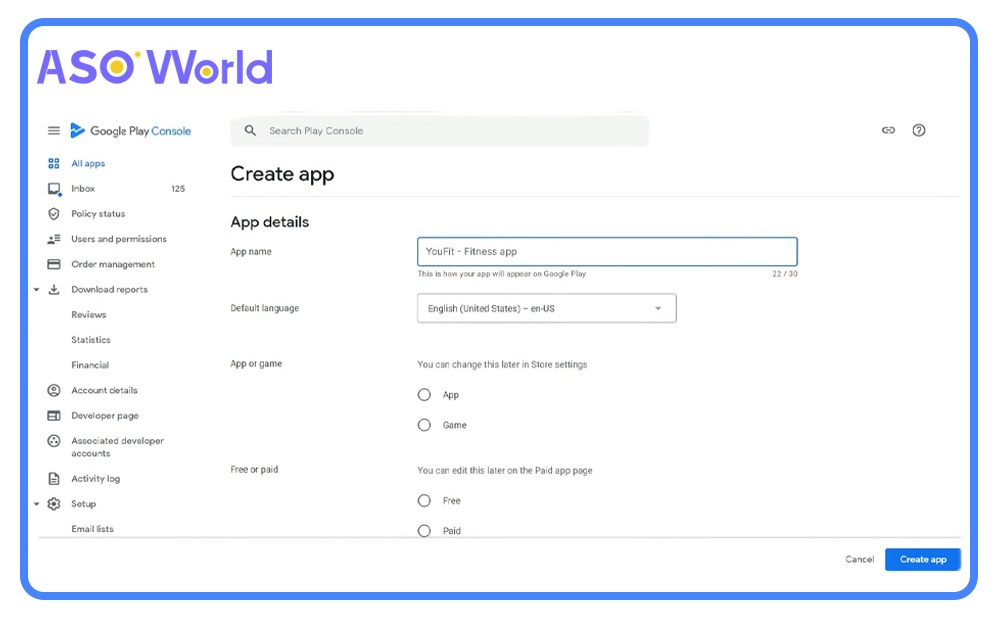
- Open the "All Apps" tab in your Google Play Console.
- Click "Create App".
- Select your app's default language and enter the app's title (this can be changed later).
- Choose the following options:
- Whether you are creating an app or a game (modifiable later).
- Whether the app will be free or paid.
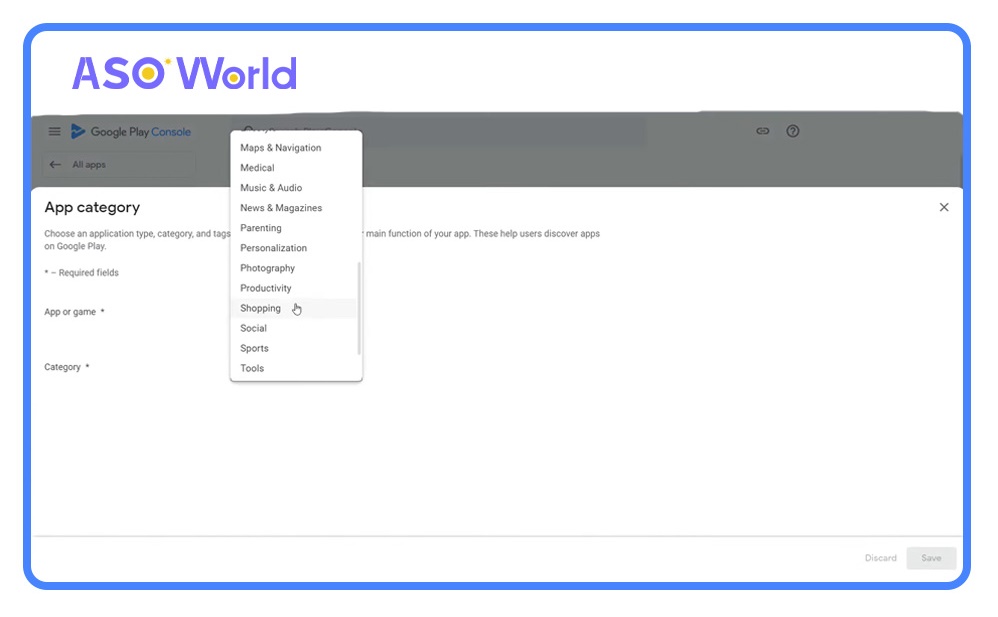
- Select the app category from the list.
- Provide an email address for user contact.
- Go to the "Declarations" section and confirm your agreement to the Developer Programme Policies and U.S. Export Laws.
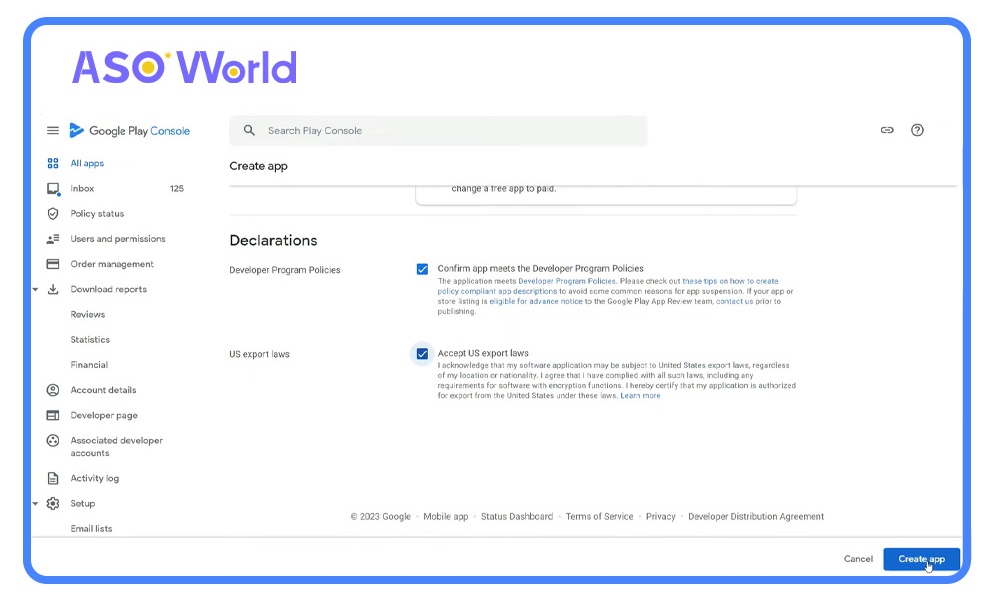
Once completed, click “Create App” to proceed.
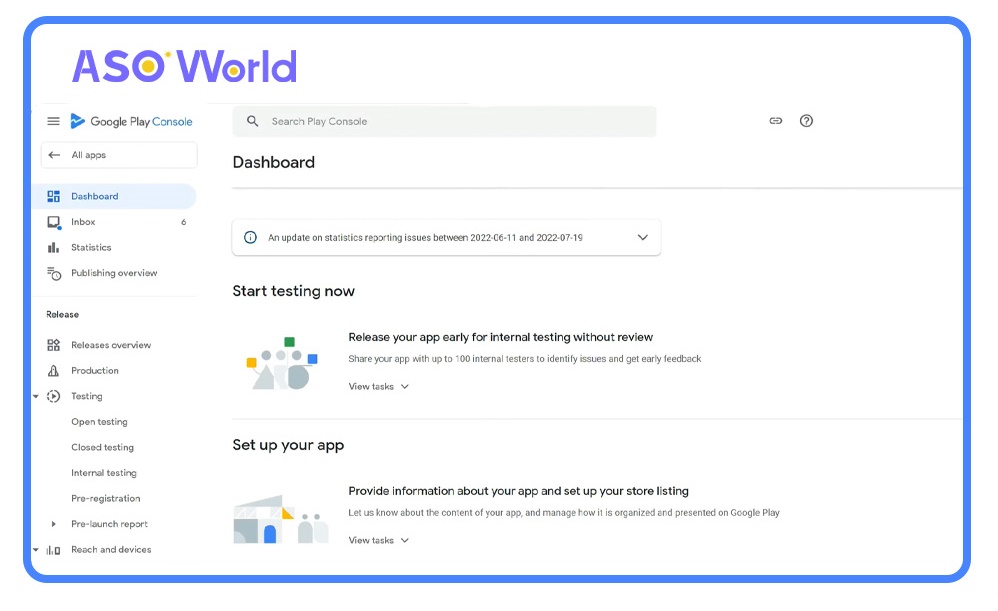
Step 4: Configure Your App
After clicking "Create App", you will be redirected to the dashboard to complete your app setup. Google will guide you through publishing requirements, including security assessments and review procedures.
Privacy Policy
Provide a privacy policy link clearly explaining how your app collects, uses, and shares user data, including any third parties involved.
Key points to include:
- Developer information and privacy contact details.
- Types of personal and sensitive data accessed, collected, or shared.
- Security measures for handling user data.
- Data retention and deletion policies.
A well-defined privacy policy is mandatory, particularly for apps targeting children, as omissions may lead to removal from Google Play.
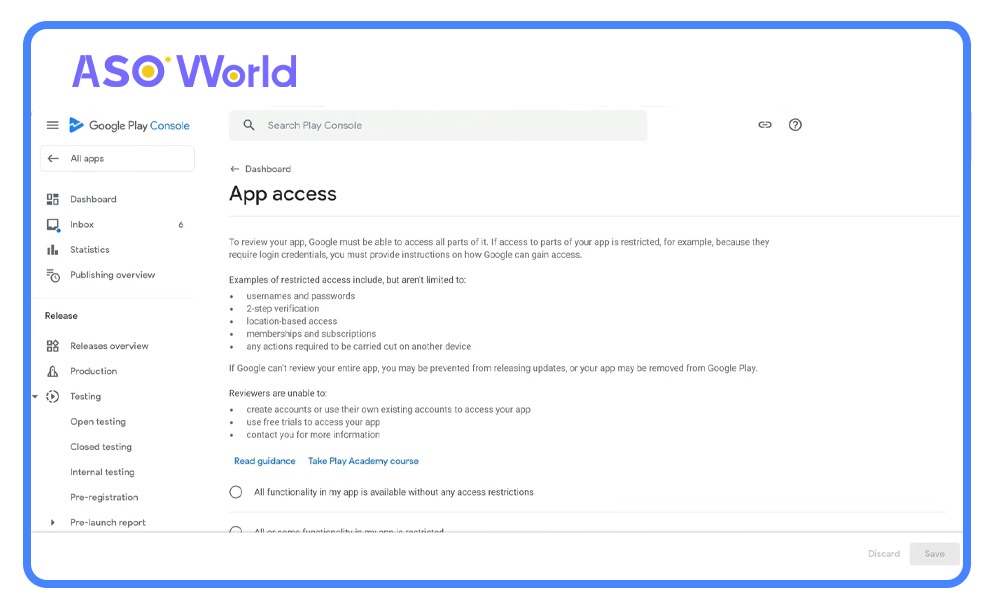
App Access
Grant Google access to review your app’s elements and content.
Advertising
Specify whether your app contains advertisements, including third-party network ads.

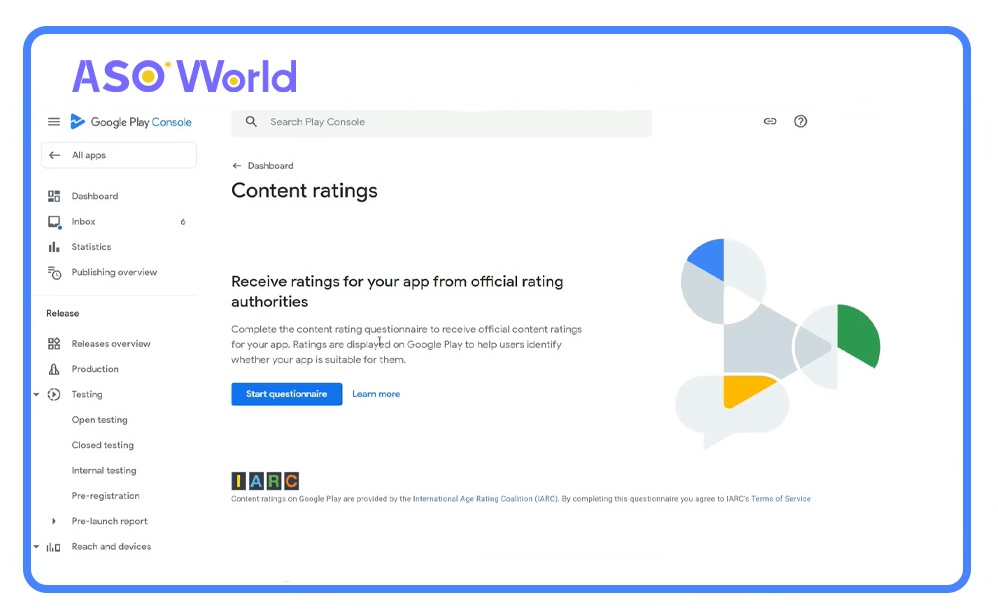
Content Rating
Complete a survey to determine your app's age-appropriate content rating. Accurate ratings ensure you target the correct audience and avoid being flagged as "unrated" or removed.
Target Audience and Content
Select your app’s intended age group:
- Under 13: Submit a Family Policy Declaration.
- Over 13: Indicate if your app inadvertently appeals to children.
Educational apps may qualify for Google’s Expert-Approved Programme, gaining a badge and placement in the Kids category.
News Apps
If relevant, confirm your app complies with Google’s news app policies.
Data Safety
Provide details on how your app collects, uses, and protects user data.
Government and Financial Features
Declare if your app is associated with a government entity or includes financial features, as required.
Step 5: Manage Your App’s Organisation and Presentation
At this stage, select a category for your app and provide contact information in the Information Centre.
Choose a Category
From the list of categories provided in the Play Console Help, select the one that best suits your app or game.
👉 How to Choose the Right App Category to Boost Organic Traffic
Add Tags
Google will prompt you to choose tags from a predefined list. Tags describe what users can do with your app or game, enhancing its discoverability.
Refer to Google Play’s guidelines for selecting suitable categories and tags.
Provide Contact Information
Google Play requires developers to provide contact information to facilitate user enquiries. At minimum, provide an email address. Optionally, include a phone number and website link.
After completing these fields, proceed to set up your store listing.
Step 6: Optimise Your Store Listing for Success on Google Play
Creating an effective store listing is essential before publishing your Android app. This involves optimising text and visual metadata to improve visibility in search results and boost user conversions.
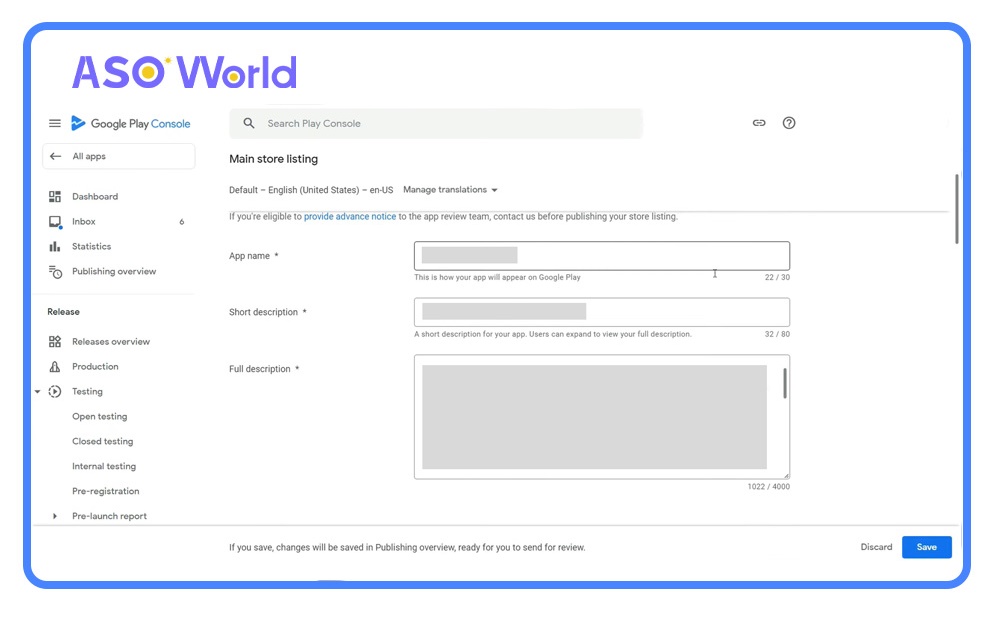
Text Metadata Optimisation
App Name:
-Character Limit: 30 characters.
-Purpose: Clearly convey the app’s purpose and benefits.
-Tips: Include relevant keywords to enhance discoverability.
Short Description:
-Character Limit: 80 characters.
-Purpose: Appears under app screenshots and encourages users to explore further.
-Tips: Highlight core features and include high-priority keywords.
-Importance: Indexed by algorithms to drive organic traffic.
Full Description:
-Character Limit: 4000 characters.
-Purpose: Influences search rankings and provides detailed information about the app.
-Keyword Strategy:
- Repeat important keywords 3–5 times.
- Maintain keyword density around 3% (avoid exceeding 5% to prevent being flagged as spam).
-Content Suggestions: Emphasise your app’s unique selling points, features, and competitive advantages.
👉 Why ASO (App Store Optimisation) Matters
Visual Metadata Optimisation
1. App Icon
- The app icon is the first visual element users see. Ensure it is distinctive, visually appealing, and clearly represents your app.
- Recommended size: 512×512 pixels.
- Format: PNG with transparent background.
2. Screenshots
- Screenshots demonstrate the app’s key features and user interface.
- Include at least 3–5 high-quality images.
- Use captions to highlight core functionalities and benefits.
3. Feature Graphic
- Displayed at the top of your app’s Play Store page, this banner is crucial for attracting attention.
- Recommended size: 1024×500 pixels.
- Use clear, engaging visuals that reflect your app’s value.
4. Promo Video
- Optional, but highly recommended. Videos increase user engagement and conversion rates.
- Upload via YouTube and embed the link in your store listing.
- Duration: ideally 30–60 seconds, highlighting app functionality and benefits.
Step 7: Upload Your App Bundle or APK
- In the "Release" section, select "Production" and click "Create New Release".
- Upload your app bundle (.aab) or APK file.
- Add release notes to inform users about new features, updates, or bug fixes.
- Review and confirm compliance with Google Play policies before submission.
Step 8: Review and Publish
- After completing all required fields and uploading your app files, Google will review your submission.
- The review process typically takes 24–48 hours but may take longer for new accounts or certain app categories.
- Once approved, your app will be live on Google Play and accessible to users worldwide.
Step 9: Promote Your App via ASO
Optimising your app listing using App Store Optimisation (ASO) can significantly increase visibility, downloads, and user engagement. Key strategies include:
- Keyword Optimisation: Use relevant keywords in the app title, short description, and full description to improve search ranking.
- Visual Optimisation: Use appealing icons, feature graphics, and screenshots that highlight your app’s strengths.
- Ratings & Reviews: Encourage satisfied users to leave positive reviews and ratings, which influence rankings and trust.
- Update Frequency: Regular updates demonstrate app maintenance, enhance performance, and retain users.
- Localisation: Translate your app listing for target markets to improve downloads in different regions.
Conclusion
Publishing an app on the Google Play Store requires careful preparation, from account creation to store listing optimisation. By following these steps and applying ASO strategies, developers can improve app discoverability, attract more downloads, and ultimately increase revenue. Remember, attention to detail in both metadata and visual assets is key to success on Google Play.
 COVID-19 UPDATE